Friday, October 7, 2011

The Beard Hat

So I saw this pattern for sale... and didn't want to buy it, but thankfully I found the free pattern.  So for all my fellow crocheters, here is the Beard hat pattern. 
Free Beard Crochet Pattern courtsey of Gumbo Soul:

Start by making a beanie. Any beanie. There are PAGES UPON PAGES of FREE crochet and knit patterns for all different sorts of beanies all over the web, so for goodness sake, don't buy those either.

I used a bulky yarn (5,6 on the bulk scale) and a K hook, but I think you could use this same principle to make one with less bulky yarn and a smaller hook, just add/subtract stitches accordingly. My husband is my model in the pic. He has a kind of teen-agery face, but this hat also fits my dad who has a very manly face, so this will fit a teen-adult.

If you want it to be fitted, it helps to have the beanie and the person it is for handy, at least until you figure out your basic sizes, which I haven't done yet, so this won't be an exact pattern, but a good formula to base your own off of.

Stitches:
Chain stitch
DC- double crochet
HDCD- half double crochet decrease
HDC- half double crochet
Slip stich
SC- single crochet

I started by chaining about 25-27 stitches. I put on the beanie, and then chain stitched, stopping every now and then to stretch my piece across my upper lip to where it would connect under the beanie about an inch on either side. For my adult face, this was about 25-27 chain stitches.

DC- back across, one DC in each stitch. Chain 2 and turn.

DC in next Stitch. HDCD across the next two stitches. Repeat across. When you get to the end if you have two stitches and are on HDCD, finish it out. If you only have 1 stitch left and are supposed to DC or HDCD, just finish it with a HDC. Chain 2 and turn.

DC in next stitch. HDCD across next two stitches; repeat across. Chain 1 turn.

SC about 6 stiches across. Again, put your beard up to your or the person's face to determine how far in you want to go. This is where your mouth hole will be, so SC into where you want the hole to begin. Then slip stitch across to the same number of stitches from the end. For example: I did 6 sc, slip stitched until I got to the 6th stitch from the end and then SC the last 6 stitches.

Chain 2 and turn.

DC across the SC stitches (in my case, 6). Now, count the number of slip stitches you made in the previous row. However many there are, chain that same number of stitches and then DC across your last SC (in my case, the last 6 stitches. Now you have a nice hole for your mouth to be in. When you get to the end, do not tie off, but continue stitching around down the side of the beard.

I alternated DC and HDCD down the sides of my beard to take it in a bit. This helps the bead to "cup". When I got to the bottom of my beard, I continued around the bottom with a SC until I got to the other side where I DC and HDCD up the side. This brings you up around to the top of your beard. You can finish of the top by SC across the top that goes across your lip, but I didn't feel the need to, so I just tied off and weaved in the ends. You should have a nice beard now that is sort of cupped where it will hug your face.

Crochet your favorite type of mustache either directly onto the chain stitches across the top of the mouth hole, or crochet it separate and stitch it on using coordinating thread and a yarn needle. Attach your hat to your beanie by stitching or crocheting it to the under side of your beanie, going up about an inch underneath the edge. Alternatively, you could make it removable with buttons if you so choose.

Adjust your number of beginning stitches according to the size you are making and the bulk of your yarn.

The DC across.

Then alternate DC and HDCD across the next two rows.

Then SC into your mouth hole, slip stitch across mouth hole, SC to the end

Then double crochet to mouth hole, chain across the mouth hole, SC to the end.

Then double crochet/half double crochet decrease down the side.

Then SC across the bottom of beard.

Then double crochet/half double crochet decrease up the side

finish off.
add mustache
attach to hat.

Crafty by Default,

Cana

Thursday, October 6, 2011

Long time, no post

So, I had disappeared for a while.  I know, surprise, it has been 2 months (as of yesterday).  But no more.  I'll be posting new and unusual crafts, as well as some just plan regular fun crafts as we go along!

Looking forward to the craftiness we will be getting into!

Crafty by default,

Cana

Friday, August 5, 2011

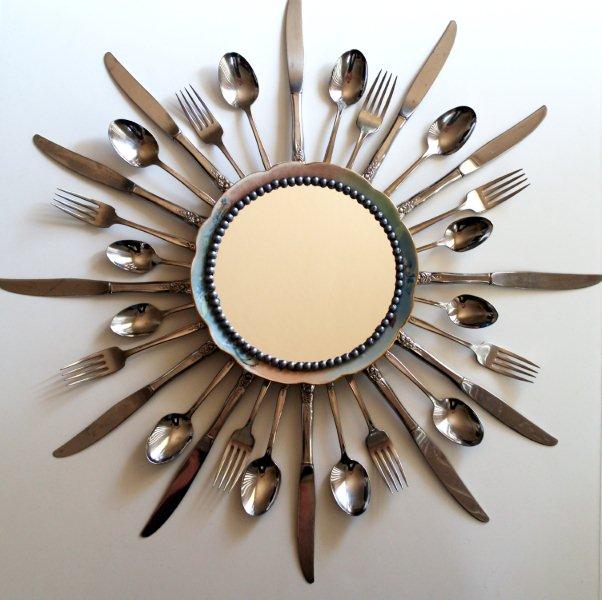
Searching Saturday: Mirror, Mirror, On the Wall

So because of all that is going on in my life-- Ingenious Friday and Searching Saturday are combined this week!!!!
What do you do with that old boring mirror?
So this week's Searching Saturday is all about mirrors!
Mirrors use to be only for gazing at your reflections, but now, they can be used for so much more.


Happy Searching!

Crafty by Default!

Cana

Wednesday, August 3, 2011

Cana's Future Craft of the Week: Paper Mache Yarn Bowls

So here is my future craft of the week:  Paper Mache Yarn Bowls.

Combine ½ cup flour and 2 cups cold water in a bowl.

Boil 2 cups of water in a sauce pan and add the flour and cold water mixture.

Bring to a boil again.

Remove from heat and add 3 tablespoons of sugar.

Let cool. The paste will thicken as it cools.
Wrap saran wrap around a bowl (or you can just use a balloon).  Dip the yarn in the paper mache mixture and then wrap it around the bowl.  Let dry for 24 hours before remove the yarn bowl from the bowl.  

Friday, July 29, 2011

Ingenious Friday: Magic Pallet Ride

So this week's Ingenious Friday is all about the Pallet!
So you have this pallet lying around... what are you going to do with it?  Well, then today you are in luck, because I'm going to help you use that old pallet!  **Warning:  While other Ingenious Fridays might be free of influence from other blogs, this one needs the help of other crafters for instructions for those of us who have yet to try these projects!**

So with that pallet, you can

What will you do with your old wooden pallet?

Crafty by Default!

Cana

Thursday, July 28, 2011

Clothing everywhere!


So in my search for new clothes to fit my smaller body (Yay! Having lost 35 lbs in the past 6 months!), I have decided to go back to my sewing machine.  Of course it needs to be fixed, so I'm trying out clothing ideas that I can hand sew or no sew at all!  So this is the first of several clothing projects that are on my list of things to do until I can get the sewing machine fixed.  

This week's clothing was a vest/wrap.  All it requires is stretchy, non-raveling fabric (about a yard/ yard and a half), measuring tape, and scissors.  This is literally the easiest NO SEW project you can do!

  • First, always make sure you wash your cloth before using it.  You don't want it to shrink up on you later!
  • Then lay out your cloth on a smooth, undisturbed surface (a bit hard if you have cats, but remember YOU are the Cat Pack Leader ;}).
  • Measure from the top edge (where your collar will be) six inches.  Then from that point mark six inches down (going towards the middle of the fabric).  Mark the spot and measure a 6-9 inch line (this will be your arm holes.  length is decided by how big your arms are).
  • Cut the line for your armhole (make sure to cut even, straight lines).
  • Put it on!  Your new Wrap is done!


Thanks to Behind the Seams for this great idea!

Crafty by Default,

Cana

Tuesday, July 26, 2011

Book Review: The Little Green Dress By Tina Sparkles

Never shop retail again with this chic and sweet collection of DIY patterns from a former host of DIY Network’s Stylelicious, Tina Sparkles. Joining the green movement was never so easy — and cost saving! With Sparkles’ stripped-down approach to patterning and sewing, the delightful dresses, tops, skirts, and pants in this fashion-forward project book will not only raise your eco-IQ, but open your eyes to new methods for sewing garments. Author Tina Sparkles, a talented and imaginative designer, offers up an array of project ideas that are both earth- and user-friendly. Readers can pick and choose the patterns that suit them best, from A-line, tiered, and bubble skirts to “body tube” dresses and “cap-sleeve cutie” blouses. Included are sewing and shopping resources and a fitting guide.

Little Green Dresses: 50 Original Patterns for Repurposed Dresses, Tops, Skirts, and More

My rating: 3 of 5 stars


This book shows readers how to re-use/harvest cloth from old clothes, and how to refashion clothes. Chapter 1: Sewing introduction, with the 4 levels of sewing
Chapter 2: Using and Creating Patterns
Chapter 3: Tops (Patterns)
Chapter 4: Skirts (Patterns)
Chapter 5: Dresses (Patterns)
Chapter 6: Bottoms and Rompers (Patterns)

When I read this title, I was like, "Yay! Finally a way to re-use all those clothes that have become too big for me to wear!" Which, this book is good for giving ideas on how to re-use those ex-large clothes that no longer fit, but for me this book was more for a beginner sewer than for someone who is intermediate or advanced. But, it still has it's good points for any sewer to have it in her library.

Good points for this book include that it gives not only the pattern difficulty (Levels 1-4), it also gives the sewing difficulty (Levels 1-4). All patterns are referred back to previous patterns, so it is best to start at the beginning with a Sewing Level 1, Pattern Level 1 and work your way forward instead of skipping around. Everything in this book builds upon itself, which makes it a great beginner sewer book.

Also, Chapter 2 gives wonderful introduction and ideas on how to create, patterns, use tools for creating, measuring for your pattern, copycatting a pattern you like and the basics on using a pattern. And this is great, because we all know that sometimes we experienced sewers need that refresher on how to do something. And if you have never made your own pattern before, this gives you some great pointers.

Personally, I found this book to be targeting the young adults and teenagers. I personally found very few outfits that were appealing to me as an adult.

Highly recommend for the new sewer, the needed refresher on techniques, and for those who want to learn to create their own patterns using recycled/reused fabrics from clothing.


View all my reviews

Sunday, July 24, 2011

Baby Blanket #2 and #3 are now back on!!!!!

So surprisingly, I stopped by Michael's yesterday, and guess what?  They had BB #3's yarn that I needed!  A little more than I would have paid from online, but I need to get this blanket done.  I also picked up the rest of the dye lot for #2, and will return to it in full force.  I also picked up 2 skeins of a color called "plummy", a lavender, purple, pink, white variegated yarn.  I'm thinking to try something fun with this one, but we will see.

Crafty by Default,

Cana

Saturday, July 23, 2011

Baby Blanket #2 and #3 on hold-- New Baby Blanket #4 begins

So Baby Blanket #2 is on hold because I've run out of the dye lot of the white I was using, and am searching for the closest dye lot possible without having to take it all out and start over.  And Baby Blanket #3 is on hold, because the yarn colors I'm looking for are on back order :(  But one day, my yarn will come!
All of this is a great reminder to always buy the colors that you need 1 extra skein, because you never know when you will need it!

So I've begun on BB#4, which at this time is not for any baby yet.  It is more of an experiment.  It is a pentagon center, with a flower border.  I'm still working on the details (and the huge pentagon center), but I should be putting up pictures soon.

So what projects are you working on?

Crafty by Default,

Cana

Searching Saturdays: Kid friendly and loving it!

So this week's Searching Saturday is all about things that you can do with your children/grandchildren/class. 

Hula Hoop Rug is a great child/children craft activity, probably best for children who are around 8 and up.  All you need are old t-shirts, a hula hoop and scissors. 

Creative wind Chimes:
  • Clay pots and old keys
  • Chains, pad locks, keys and old metal ornaments
  • Broken plates and fishing line
  • Anything that makes noise :)

Glitter shoes are a great way to breath new life into some old shoes OR change it up with buy cheap shoes and making them designer (by you of course).

Glow Stick lantern:
Take a glow stick, cut it open, and pour into a mason jar (or jar of your choice).  Shake up the jar and watch it glow!
Tumblr_l6y89sozbz1qa3fgno1_500_large

Yarn Ball can be made into mobiles, wreaths, ornaments, and so much more.  Really cool, and really simple.  Great craft for children!
Zipper Bracelet is a great craft for old children/teenagers.  Teenagers especially will like this craft, just because it is so cool looking!

See Zipper Bracelet and 1000's of others - or share your own on Cut Out + Keep

There are so many more ideas out there.  Make sure that you go and do a search yourself!

Crafty by Default!

Cana

Friday, July 22, 2011

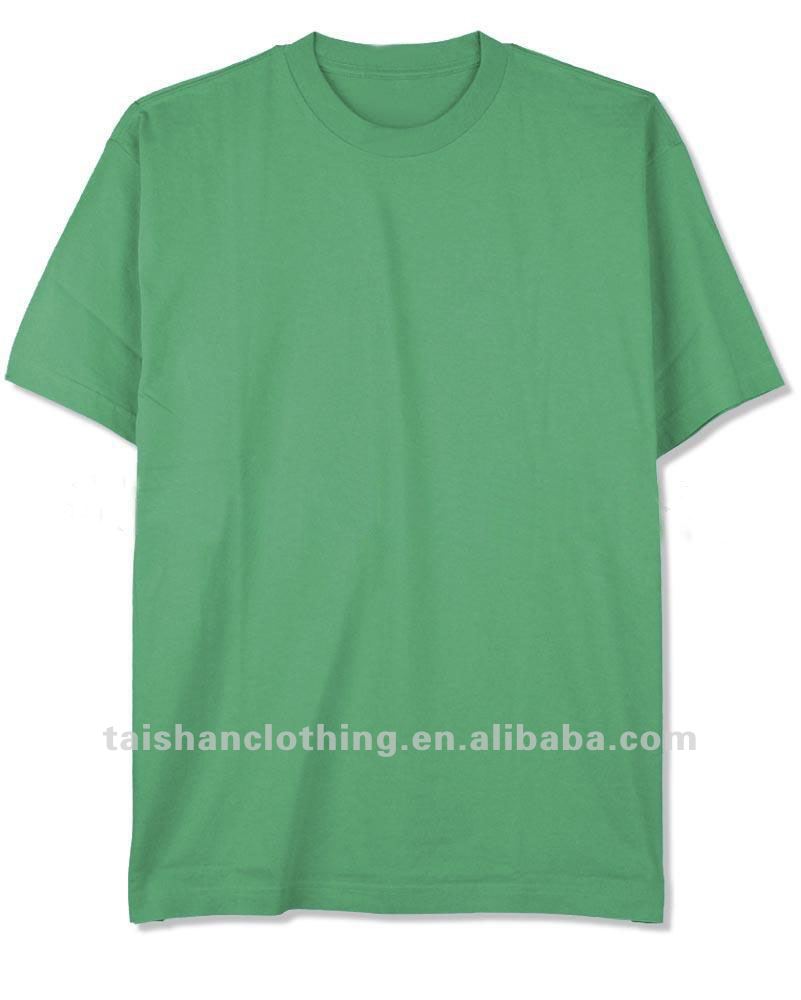
Ingenious Friday: Who wears T-shirts... I wear T-shirts

So for today's Ingenious Friday, we are talking about a piece of clothing close to my heart.  Almost everyone of us has at least a few in our closets, and at times they can be a mandatory wardrobe when it comes to cleaning the house or working outside.  T-shirts have been the staple of clothing for years, so why not pull out that old t-shirt you haven't worn in ages and give it some new life?

So what can you do with an old t-shirt?


  • Tye-dye the t-shirt... Especially if it is a white t-shirt with stains.  Tye-dying will cover up all sins of a white t-shirt. 
  • Upcycle your t-shirt:  Turn it into a skirt, change the collar, make it sleeveless, turn it into a dress, and the list goes on!  What ever your mind can come up with, you can try it when upcycling your t-shirt.
  • Making a t-shirt memory quilt.  This does require some extra patience, since most t-shirts are mixed fabrics with spandex, cotton, polyester, and other ingredients.  When preparing to sew a t-shirt quilt, just remember not to pull too hard on the t-shirt fabric.  It can make it uneven.
  • Turn the t-shirts in to pillow cases.  Turn the t-shirt inside out, sew the arm holes and neckline shut and cut the sleeves off.  Works best with smaller pillows. 
  • Turn it into yarn!  This personally is my favorite, and why not?  Who doesn't love a good ball of yarn.  Just cut the t-shirt into consistent strips and either sew or knot the ends together.  
  • Make jewelry or hairpieces out of the old t-shirt.  
What will you do with your old t-shirt?

Crafty by Default!

Cana

Tuesday, July 19, 2011

Coolest Headphones EVER!

So on my favorite unique website, I found the perfect headphones.

And I wanted them!  But $40 for headphones, that was unrealistic to my poor wallet.  So when in doubt, find a pattern.  This proved harder than I had thought it would be.  First of all, all the patterns online were only for the ear portions, NOT the actual headphones.  So I did what any good arts/crafts/crazy person would do:  I made my own pattern.  


Though the headphones online had a bow, I decided to try something different:  A flower
I used a pentagon granny square. (2 rows)
Then I half-crocheted around the center.  To make the pentagon look more like a flower, I then sewed the sides down, leaving the points as the petals.  

Final Product:

My flower headphones, so I can look cool while I listen to my music.

The pattern is pretty easy, even with me just fooling around, it took about 8 hours total to pop one out.  I hope to later blog the pattern.  Just comment below if you are interested.

Crafty by Default,

Cana


Monday, July 18, 2011

Munchies Monday!

So occassionally, there will have to be a Munchies Monday- Just because I love food!  That and cooking is a definite fine art. 

Anyways, today's Munchies Monday is from Sugar and Merangue. 
You can go for Ball of Yarn Cupcakes, which look JUST BEAUTIFUL!

Or you can have a Crocheted Granny Square Cookies look delicious, and I can't wait to try to make them! 


You can use her Granny Square Sugar Cookie PDF Tutorial.  Can't wait to see how they might turn out!

Crafty by Default!

Cana

Sunday, July 17, 2011

New Washer and Dryer inspires GREAT crafts!

So, to my joy and celebration, I got a used washer and dryer from someone this weekend.  I had to thus re-arrange my kitchen (btw, old farm house + new appliances = No Sense in how things are arranged!).  Because of this, I needed to figure a way to hold certain items and to do a schedule for laundry/other events.  

So first, I built a shelf.  This particular one is called a missionary shelf (I don't know why, but it is functional for holding my Purex 3-in-1 detergent and my keys/pocket remnants).  I actually built 2, but I'm going to have to find a good place to put it.  Though, I'm thinking about putting it by the door, which would make it easier for me to use for things like mail and keys.  
The second thing I made (though I had made it earlier, but hadn't actually used it much), was my Memory Box To-Do List.  I painted the memory box in Almond, and put in red/pink striped and gingham Memory Book paper with Silver and black stickers.  I use a Expo dry-erase marker for writing on it.  I plan to use it to write which days are laundry days once I catch up on all my laundry.  


So with all this fun, you can be sure more arts and crafts are on their way.  The dryer (no pic yet) has a rusted top, just superficial, but I'm thinking of ways to make it look decent.  Also, I need to find 2 floor shelf systems to fit into the tight spaces to hold other laundry supplies.  At this time the measurements are a bit awkward, but maybe I'll be making some shelves.  Stay tuned for more on this laundry front.

Crafty by Default,

Cana

Saturday, July 16, 2011

Searching Saturday: The Joy of Shaving Cream

Have you ever just wanted to do something neat, creative, and just plan crafty, but didn't have a lot (or any) supplies.  Well that is what got me thinking.  What did I have in my house that was available that I could entertain several kids.  The one thing I had a lot of was shaving cream (I can thank that Polish heritage for that! ;-P).  So I did a search and this is what I discovered. 

  1. You can Marblize wooden Eggs, or just about anything else that is wooden.  All it takes is food coloring and your wooden object.  And if you are like me (and most crafters that I know), you have a few spare wooden objects for crafts lying around!
    Items you need:Wooden objects, Shaving Cream, Food coloring
  2. You can create marblized card/note paper. The link shows a holiday note card in the shape of an Easter Egg, but you can do them in whatever shape (including not chaning the shape from it's rectanglar shape) for whatever project you need. (Another example of this using also stamps is Thinking of You card.  Absolutely beautiful!!)

    Items needed:  Card stock (heavy paper), Acrylic Paint, Shaving Cream, Scissors (optional), Pen
  3. You can make 3-D images like Polar BearSnowman, or any other 3-D object you want to attempt. Add for special items food coloring. 

    Items needed: Elmer's Glue or Puff paint, shaving cream, paper, food coloring (optional).
  4. You can try shaving cream tye-dye, which almost reminds me of batiking. 

    Items needed: Clothing/cloth you want to tye-dye, shaving cream, paint, food coloring.
  5. For bathtime/water time fun, shaving cream paint.  Just make sure to rinse whereever the paint is used!

    Items used: Shaving cream, food coloring, paint brush.
So, the next time you want to try something fun and messy, try the shaving cream craft method!

Crafty by Default,

Cana

Friday, July 15, 2011

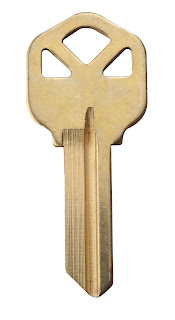
Ingenious Friday! Old keys

Today's Ingenious Friday is all about Keys!

We all have them, old keys from locks, doors and what not that we either don't need anymore or don't remember what they are for.  I know personally, that I have at least 2 keyrings full of keys that I don't use, will never use again and I would love to do something with them. 

So here are some ideas for those spares that will never be used again:
  • Make a windchime
  • Use as jewelry (either turning it into a ring if big enough or as a charm)
  • Make into wall art using canvas and wire and whatever else you want
  • Use in a mobile
  • Sewn into the hem of your shirt/skirt/dress to weigh it down properly.
  • Use them as stencils or stamps for other projects. 
  • Paint them and use them for whatever you want!
So what is your ingenious idea on using old keys?

    Thursday, July 14, 2011

    Pentagon Granny Squares and other things to do


    So here is my first attempt at a pentagon granny square.  I think it looks pretty good.  Actually now that I made it, I'm thinking about making a few that will look like owls (doesn't the shape kind of shout owl).  These squares are going to be for Baby Blanket # 4.  Still looking for the right pinks to go with the browns, so more updates are coming.

    Other things going on in the crafty world of Cana:  Going to try to make a dress from scratch, with just the pattern in my head.  I know, crazy, but it will really make sense later.  It is going to be like a pillowcase dress/top (very popluar), only the dress is going to be longer and I'm going to make a belt that will cinch it at the waiste.  I'm experimenting with a solid white cotton cloth that I had from another left over project, so I'll see how the idea works out.  Below are some sketches that I  drew of the potential dress. 
    Finished product

    Before the belt.  (The blue lines are stitches, the red lines are edges.)


    Crafty by default,

    Cana

    Wednesday, July 13, 2011

    Pattern for Baby Blanket #3 (Peter Rabbit Blanket) and planning for Baby Blanket #4

    So during my job on 3rd, i started to work on the plan of attach on the baby blanket.  Here is what I came up with.  Tonight if all goes as planned, I'll be putting together the afghan.

    /^/1/3/5/7/^/
    /*/#/^/^/1/3/
    /5/7/^/^/9/+/
    /0/2/4/6/8/*/
    /- Border
    ^- WHITE
    1- Baby Blue edge with Navy center (2)
    2- Baby Blue edge with Tan center
    3- Bright Blue edge with Grass Green center
    4- Bright Blue edge with Tan center
    5- Dark Brown edge with Baby Blue center
    6- Dark Brown edge with Bright Blue center
    7- Grass Green edge with Bright Blue center
    8- Grass Green edge with Dark Brown center
    9- Medium Blue edge with Dark Brown center
    0- Medium Blue edge with Navy Blue center
    +- Navy Blue edge with Baby Blue center
    *- Navy Blue edge with Medium Blue center
    @- Tan edge with Grass Green center
    #- Tan edge with Medium Blue center


    So now it is time to start planning the next baby blanket.  Baby Blanket #4 is for a little girl.  Color scheme, I've been informed, is browns and pinks.  So this weekend, I'll be going to the store looking for pinks and browns that will go together, and adding in cream (instead of white).  I'll be trying to do a different granny square, a "love" hexagon,
    which I got from Le monde de Sucrette's blog (You can see she is doing a giant granny square challenge right now if you want to participate).  You can see the method in the graph below:

    I'll update with pictures as I work on this!

    Crafty by Default,

    Cana

    Tuesday, July 12, 2011

    Going crazy with Leftovers!

    So, today while at work, I decided that I was going to try something new.  I realized that I had tons of yarn left over from other projects: blankets, scarves, a poncho.  But there isn't enough for those colored bits of yarn to make a whole new project.  At first I was thinking to start a granny square block box, but then brillance occurred.... Or maybe one of my many special crazy moments.  Thus the name of the next project I'm going to work on is call a crazy afghan. 

    So if you have never seen a crazy quilt, they are unique quilts with bits and pieces of fabrics (no shape, size, or stitch is the same) that are sewn together.  Most are made from scraps from other projects.  Since I have so much yarn, but not enough to make a whole new project, I'm going to try and make a crazy afghan using the leftover yarn and different crotchet motifs. 

    So, in the next few weeks/months, we shall see how it all goes.  But this idea begs me to ask, what do you do with your little bits of leftover yarn?

    Crafty by Default,

    Cana

    Current Project: Baby Blanket #3, Keep on Crocheting!

    So as I continue to work on B.B.#3, I keep changing my mind about what, how, and how much to do it.  There will be 36 squares in the blanket, so I'm trying to make sure it will be unique as well as practical.  As you can see from the pictures below, I changed how the colors were going to go together. 

    Baby Blue edge with Navy center
     

     Baby Blue edge with Tan center
      

    Bright Blue edge with Grass Green center
     

    Bright Blue edge with Tan center
     

    Dark Brown edge with Baby Blue center

    Dark Brown edge with Bright Blue center
     

    Grass Green edge with Bright Blue center
     

    Grass Green edge with Dark Brown center
     

    Medium Blue edge with Dark Brown center


     Medium Blue edge with Navy Blue center

     Navy Blue edge with Baby Blue center

    Navy Blue edge with Medium Blue center

    Tan edge with Grass Green center

    Tan edge with Medium Blue center

    Add to this, solid white squares, and I think that it will look beautiful.  Perfect for the little baby boy I'm making it for.  My hope is that the pattern will look something like this (O for the white squares, X for the other squares):

    OXXXXO
    XXXXXX
    XXOOXX
    XXOOXX
    XXXXXX
    OXXXXO

    Crafty by Default,

    Cana
    

    Saturday, July 9, 2011

    Searching Saturdays begins today!

    So, it is the weekend, a time where if you are bored, you go searching the web.  So I decided to share with you the sweet labor of my craft searches on the wonderful WWW.

    These cute sandals by the Nap time Crafters are so cute, I am waiting for a friend to have a little girl so I can try making them myself!
    Then Two Crazy Crafters inspired me to try canvas art, and not just in using paint.  Anything goes for creating (and re-creating) your own canvas art.
    Finally, Freebies for Crafters lead me to the Haul It Floor Mat.  Perfect gift for parents, or at least I think so (but you can't always know if you are a single woman with no kids!)

    So on this weekend, what will you be searching for?

    Crafty by Default,

    Cana

    Friday, July 8, 2011

    Ingenious Friday!

    Ingenious Fridays are all about using something that we have been dying to use, but can't come up with a good idea to use.  This can be anything from left over popsicle sticks to cat liter boxes/jugs.  Whatever the item, we want a crafty way to use it.

    Today's Ingenious Friday item is:

    Scratched, broken, and pretty much unusable CDs


    So what can you do with a broken, scratch or just plan unusable CD?  According to some small children, throw it at others, but besides that there are many great ideas on how to use a CD. 
    • Make a clock face out of the CD
    • Make a Crackle Clock (Link on crackling your CD)
    • Make them into Ornaments
    • Make them into a book
    • Make a mobile out of them

    So here is my question for Ingenious Friday: What will you do with your old unusable CDs?

    Crafty by Default,

    Cana
     

    Wednesday, July 6, 2011

    Baby Blanket #3 - Changing your mind mid project

    So, earlier I had posted what colors of yarn I was going to do.  When I realized, I didn't like the color combination as I worked on it.  So what I did was go straight to my 30 gallon yarn tub and look at what yarn I had to go with the yarn I still wanted to use (the blues).  I primarily changed this because the baby's room theme is Peter Rabbit.  After reviewing the book (nothing like a good picture book), I decided the yellow, light tan, and cream were ok, but didn't really match anything in the book as well as the grass geen and the medium tan and chocolate brown. 
    Here are some of the partial squares.  I am going to do one more round in an alternating color, mixing the colors up. 

    Here is a completed white square.  The idea is to have a total of 4 to use at each corner of the baby blanket.
     Here is the Chocolate brown partial square.  I plan to use the medium blue as the outer edge. 
     Here is the medium tan partial square.  I plan to use the grass green as the outer edge
     Here is the baby blue partial square.  I plan to use the navy blue as the outer edge.
     Here is the navy blue partial square.  I plan to use the  medium blue as the outer edge.
     Here is the medium blue partial square.  I plan to use the medium tan as the outer edge
    Here is a Bright blue (I didn't originally have this one to use) partial square. I plan to use the grass green as the outer edge
    Here is the grass green partial square. I plan to use the  bright blue as the outer edge

    I am thinking about adding one more color, but it is hard to find a good honey gold that is commonly seen in the Peter Rabbit pictures.  If it is added, one of the double grass greens will be changed to goldenrod. 

    Now on to the next step! 

    Crafty by default,
    Cana